Sunday, June 11, 2017

Outside Roofs

June 2017

                                                      Repainting the outside roofs

I was under the impression that a light sanding and putting a new layer of epoxy paint would be sufficient on the fiber glass roofs of the main cabin and the steering cabin.
Unfortunately i found out that over the years in my opinion incorrect paint was used for the polyester roofs of the boat, which resulted that I needed to sand the complete roofs till reached the polyester.

One of the first things was t o remove the hand rails on top of the roofs, since I was alone and the  threaded rod with nut was going through the roof of the main cabin I used a small trick  by taping a screw driver to the round holding bar and unscrew the nut from the inside.

.
With the hand rails removed which were as it looked at the beginning in a bad state, I was able to sand the complete roof.


The handrails were sanded, were painted as well, and after the sanding the the round bars and the support blocks on the roof were actually in a good state no rot nor really damaged. So instead of making new ones I covered them in Owatrol D-1 and D-2 oil as future protection against the weather.
The roof was sanded holes and deep scratches were filled with epoxy filler and and painted with two component epoxy paint and afterwards sanded and polished to get a smooth surface .


The next step was to place the painted handrails back onto the roof.
The support blocks for the round handrail were placed onto the roof in silicone kit, seal and glue to prevent that there will be water ingress along the bolts where the handrails are mounted onto the roof.


This boat the mast is not placed on top of the steering cabin but on top of the main cabin. A new connecting piece was made for the power supply to the horn, and lights in the mast.


Finished roof with an opening for the ventilation in the forward sleeping cabin, fan not installed yet on this picture.


Next roof was the roof of the steering cabin same procedure was followed with paint removing closing the holes and scratches with with epoxy filler and then sanding and painting with two component epoxy paint.


Hand rails were removed as well and in his case new support blocks were made for the round hand rail since they were in a bad state, the blocks were made from mahogany. All was protected againa with Owatrol D-1 and D-2.


Finished roof


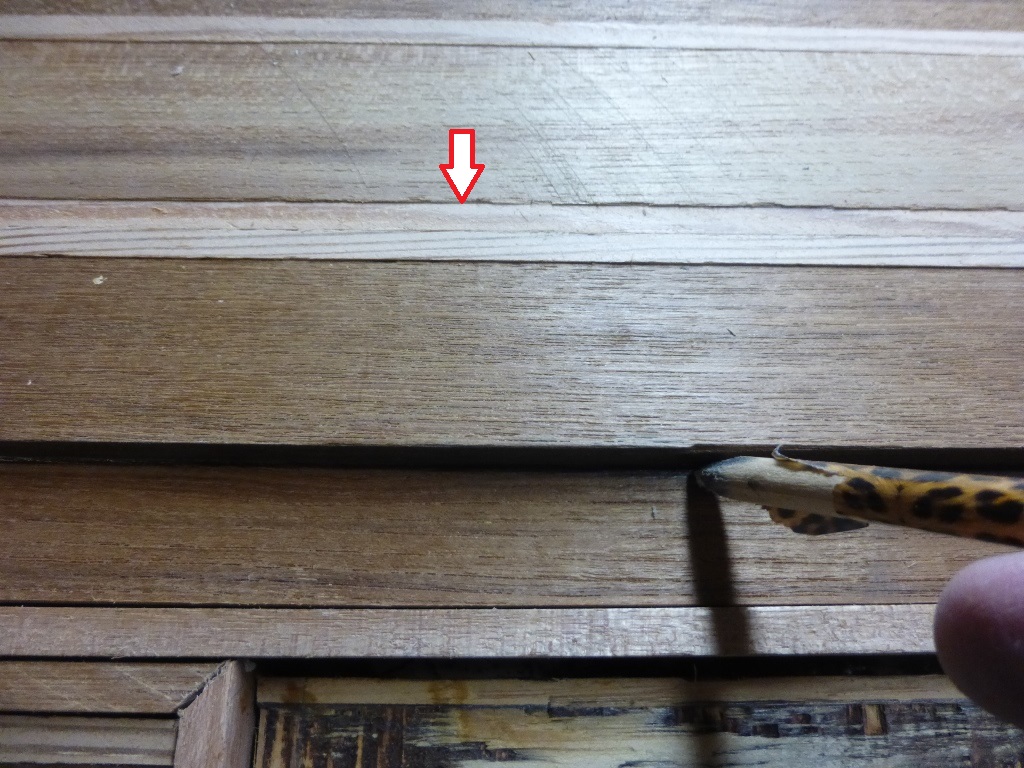
The roof for the aft cabin was completely cleaned and stripped from paint with a paint softener but this was a kind of challenging since it does not have a smooth surface.For the sides of this roof which are smooth the same procedure was followed as with the other roofs only here lots of more holes to be closed.
It was then painted with the earlier mentioned paint a thin layer as possible to keep the fish grate in the aft deck clearly visible.


The next step was to reinstall the railing poles again with the refurbished hand rails and the re-chromed hardware like corner pieces and hinges.


After the railings were placed, forgot to mark the position of the poles, so it took some time to figure out where each railing pole it's position was. When all was in place the plastic wind breakers were reattached to the railing poles.


Last picture shows the completed installation onto the aft deck.


Saturday, June 10, 2017

Renewed Floor Steering Cabin


June 2017

                                                          Floor Steering Cabin

The floor of the steering cabin looked from the beginning not up to my expectations as well as that some of the wood was damaged and a part was rotten in the corner of the deck drain.
I had some teak left over from the installation of the teak deck as well as some Birch for placing between the teak planks.
As can be seen from the next picture the repairs to the boat also did not add positive to the condition of the floor.


First step was to remove the wood placed on top of the ply wood which was the original floor of the steering cabin.
This wood small pieces was glued onto the ply wood and while removing it some of the plywood was damaged as well while some other parts cam off very easy.


The wood was removed hatch per hatch, at the same time inspecting the conditions of the hatches, good news was that the plywood and the rest of the construction of the hatches were in a good condition, most likely due to the position in the boat, above the engine room, warm and dry.


Eventually the whole floor looked like a plywood floor, interesting concept for a floor in a boat.
When all the wood was removed and the wood on the site of the hatches it was noticed that there were screw holes in the hatches which gives me the impression that the original floor has been one with rubber mats and brass rims around the hatches.
One of the reasons that the wood was removed on the site of the hatches was that the hatches did not line up which I did not like and wanted to improve. As can be seen from the next picture with the  removed wooden strips on the site of the hatches rather large gaps were created,                               


New Hardwood strip were glued onto the hatches and the hatches were modified as much as possible to get better lines in the floor of the hatched when installed. As can be seen from the next picture some of the hatches were not cut straight resulting that they needed to be modified. Left hatch with the new rims on the side while the right hatch did still have the old rim.


Next picture as well shows the difference in the hatches between length and width where they should have been exactly the same.
Right hand bottom corner with the new strip on the side of the hatch.


The first step in the finishing of the hatches with new teak was to install on all hatches the wooden piece on the side of the hatches while aiming that all lines would match up, more or less t\hatches of the same seize having the same outside diameter.


The following step was to cut the teak on the right length as well as the birch pieces between the teak. all was installed dry to find a way that at the end all lines would match up in the floor, except of the small hatch in front of the doors of the aft cabin, since this would make the teak on this small hatch look strange due to a few very small pieces of teak.


The plywood hatch was covered in epoxy glue which was colored close to the color of the teak, this to make sure that if the glue was coming out between the planks that it would not stick out as white epoxy glue. The teak planks and birch strips were placed in the exact same as dry fitted and laid next to the epoxy covered hatch to make sure that they would be fitted in the same position as dry fitted.


The hatch was covered with 100% epoxy with a toothed cam to make sure that the teak planks could be pushed into the glue as well as that with a toothed cam an equal layer of glue is applied


First two hatches finished and as can be seen some colored glue has been added on top to close any gaps if they are between the teak and the birch strips. This is not an issue since the hatches needed to be sanded to end up with a flush floor, Teak planks were made with the help of a circular saw and were not all exactly the same thickness. Although not easy to notice from the below picture the new hard wood trim pieces on the side of the hatches were kept higher than the actual thickness of the glue and the teak planks, this to come to a smooth hatch in the end.


Some of the planks needed to get cut in the length to be able to fit as closing plank on a hatch.
To make sure that the closing plank would have a tight fit the other planks were put in position with small pegs to push them hard against each other and the rims of the hatch.


Then the plank which needed to be cut in the length was marked with a sharp pencil where it needed to be cut, as can be seen two strokes of birch were placed to make sure that the correct with of the plank would remain after the cutting of the plank.


Slowly and diligent continuing the installation of the teak planks the floor started to show the way I wanted to have it as an end product, this type of work requires quite some time and one should not expect that this type of work is completed in a day or two.


 Eventually the whole floor was completed and sanded flush not only each hatch but also between the hatches themselves . As can be seen although not 100% perfect the lines between the hatches do line up much better than before I started with this upgrade.


After the sanding and cleaning the hatches were not varnished but covered in several layers with oil , in my case I used Owatrol Deks D-1, not D-2 since this will make the deck slippery when wet
As can be seen a the teak directly does get its color after applying a single layer.


After the floor was in one layer of oil the hatches were finished with installing the rings for lifting them, also here time was taken to place them in such a way that the hatch could be lifted at one side in the middle while ate the other side they would line up.


In the end the deck in the steering cabin looked as one would expect from an old wooden classic boat, 


The one thing left was to place sound insulation at the inside of the hatches , I placed not only sound insulation but also sound absorption.